

Quick answer
Keep the central bomb pocket away from the horizontal laser while preparing the left ball's route. The isolated creature is at the upper right; plan a connection to it without simply opening the entire central shaft.
- Level
- Level 35
- Difficulty
- Normal
- Objective
- Guide the red character to the green creatures in level 35, keeping each separated pocket reachable before the last drop.
Video walkthrough
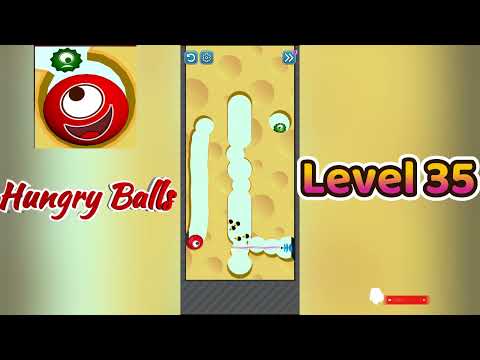
Video by Go Answer on YouTubeWatch on YouTube
YouTube loads only when you press play. You can also open the video on YouTube.
Step-by-step
Keep the bomb in a separate pocket while preparing the exit. Preserve a sand divider between it and the red ball for as long as possible.
Trace the laser line before opening any crossing. Keep the red ball behind solid cover until that crossing is visibly safe.
Check each branch for creatures before opening the final drop. A direct shortcut can leave a side pocket permanently out of reach.
Open the final downward connection after the upper route is clear. Keep the landing pocket wide enough for the enlarged ball.
Prepare the destination before opening the starting support. Keeping the first movement controlled makes it easier to tell whether a later failure comes from the tunnel shape or release order. Check the full target route after the last movement, including pockets above the final drop. If a creature remains, identify the earliest turn that missed it and change that local approach on the next attempt.
Tips
- Prepare the destination before opening the starting support. Keeping the first movement controlled makes it easier to tell whether a later failure comes from the tunnel shape or release order.
- Check the bright line before each release, including the return path. A route that is safe in one visible frame can change when surrounding objects move.
- Check the side branch before opening the lowest outlet. Once the character drops below a pocket, a later cut may no longer bring it back upward.
Common mistakes
- Opening the final outlet before checking higher target pockets can leave a creature above the character with no route back. Inspect the side entrances before making that irreversible drop.
- Removing several supports in one swipe makes the release order unpredictable. When a moving piece occupies the route, wait for it to settle before changing nearby sand.
Frequently asked questions
Why should I keep the starting support?
Keep the central bomb pocket away from the horizontal laser while preparing the left ball's route. The isolated creature is at the upper right; plan a connection to it without simply opening the entire central shaft. Prepare the destination before opening the starting support. Keeping the first movement controlled makes it easier to tell whether a later failure comes from the tunnel shape or release order.
What should I check at the bright-line crossing?
The crossing depends on the visible line and the positions of nearby objects. Compare the moment just before release in the recording. If your board differs, hold the starting support instead of assuming the same crossing is safe.
Which side pocket must I check before the final drop?
Check the side branch before opening the lowest outlet. Once the character drops below a pocket, a later cut may no longer bring it back upward.